
The “Ring of Fire” is more than a classic Johnny Cash song. It is also the name for the ring of the volcanic activity responsible for forming the unique geography of many Pacific Islands, a prime example of which is the Koko Crater. Luckily for Waikiki vacationers, taking in the scenery from the top of this dormant volcano is just a short drive and day hike away.
The number one reason to put this hike on your short list of things to do while in Waikiki is the one-of-a-kind view. Bragging rights, incredible photography and getting your cardio income as close seconds.
The trailhead and trail are located within Koko Head District Park at 7602, 7604 Koko Head Park Rd, Honolulu, HI, 96825 for those using GPS to find your way. This constitutes a twenty-five-minute drive from Waikiki Beach.
A popular hike, the Koko Crater Trail is not going to be lonely, as it attracts a number of visitors most days. Meeting your fellow hikers could be a great way to make a local connection or an international acquaintance.
The trailhead is open from 4:00 am till 11:00 pm. However, the Koko Head District Park parking lot hours are 6:30 am till 11:00 pm.
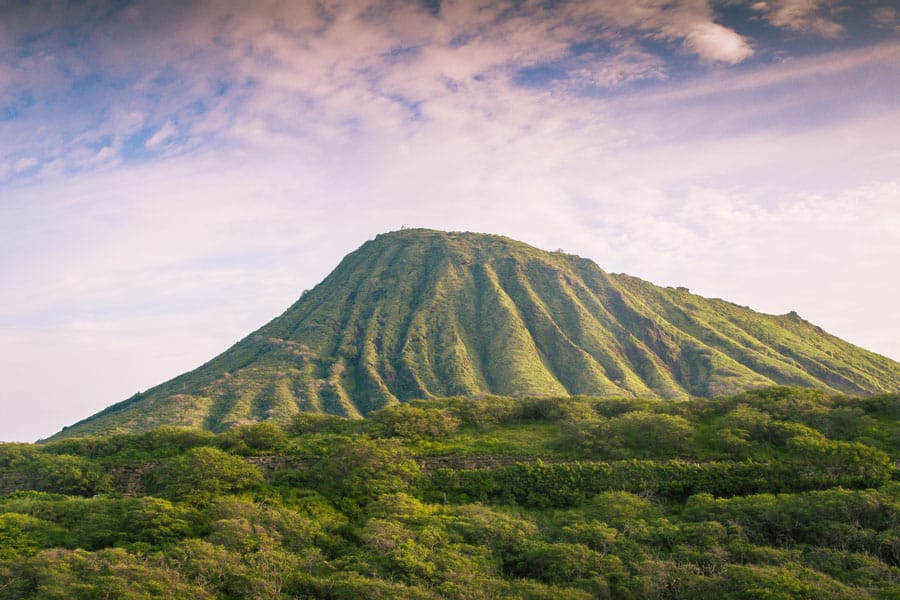
WHAT IS THE KOKO CRATER?
The technical term is dormant tuff cone volcano, which basically means that while it hadn’t erupted for a few thousand years when it did, the cone and crater were formed by ash and debris compacting into rock over time. Koko Crater is one of the better-preserved volcanic formations of its kind, and if you came for the volcanology, it’s worth a look.
For the history buffs out there, the hike has great significance regarding the second World War. The hiking trail is actually railroad track initially laid down by the U.S. Army shortly after the attack on Pearl Harbor. Koko Crater is one of the highest coastal points in the area and was therefore highly defensible. At the top of the cone lie the remains of a WW2 era pillbox which was built as munitions storage and a lookout point for further attacks.
HOW DIFFICULT IS THE HIKE?
Depending on how you look at it, hiking to Koko Crater is both very simple and quite challenging. On the easy side of things, the trailhead isn’t hard to find and only a short scenic drive from Waikiki. Also, because the trail is railroad tracks, there is no navigational difficulty, and the hike is relatively short at just under two miles long round trip.
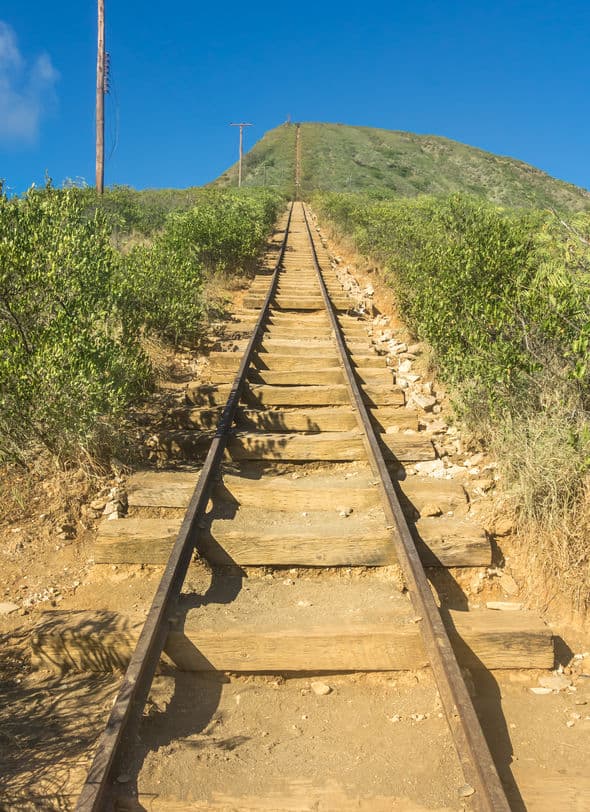
For the challenging part, the railroad tracks that make up the trail amount to 1,048 large stairs going straight up. The elevation at the top is 1,208 ft, a significant gain from the near sea level of the parking lot and trailhead. Local athletes use the trail as cardio training, and you will definitely feel the burn by the time you reach the top.
Additionally, the hike is on the dry side of the slope, and it totally exposed to the sun with little to no shade. It can get quite toasty, and it is recommended that the hike be completed in the earlier morning to avoid the heat of midday.
Ultimately, if you’re willing to be a bit tired, almost anyone can complete the hike. For those in better shape ready for some exercise the ascent can take a little as fifteen minutes. Even if you aren’t the world’s greatest athlete, and are taking your time, drinking water, and stopping often, going up is less than an hour. Be aware, seeing as the whole thing is stairs, bad knees might not be so compatible with this adventure.
Ultimately, take care and only do what you are comfortable with. This is vacation, not a race, and visitors of every fitness level make this hike frequently.
TRANSPORTATION OPTIONS
Getting to the trailhead is quite easy by car, and if you are willing to take a short walk, by bus as well. If you are driving and do not have a GPS system either on board or on your phone, inquiring at your hotel for the fastest route is a good
If you would like to take a bus, Hawaii has a great public transit system and specific times can be found at their website here. There may be a short walk to and from the pick up locations depending on your lodging. It should be noted that the bus may be unavailable on Tuesdays as there are some park closures on this day of the week.
WHAT SHOULD I WEAR AND PACK?
Because the hike is quite short, and round-trip time averages an hour and a half, food is optional. Water, however, is an absolute must. A day pack containing plenty of extra water, sunscreen, a small first aid kit
Athletic wear that can protect you from the sun is the recommended choice of wardrobe. Shorts, a light long sleeve shirt, and sturdy shoes would be perfect. A hat and some shades would be welcome as additional sun protection.
IS THERE ANYTHING I NEED TO BE CAREFUL OF?
As stated, the sun is out, and that means heat exhaustion and dehydration are possibilities, albeit very preventable ones. Heat exhaustion is pretty self-explanatory, but it happens when the internal body temperature rises over its normal levels. Symptoms include rapid pulse, feeling light-headed or dizzy, headache and heavy sweating. Dehydration often goes hand in hand with heat exhaustion and is often a contributing factor.
Both of these are common during physical exertion in hot, humid climates, but resting often and drinking plenty of water are easy ways to head such issues off at the pass. Should you notice any of the symptoms, taking a break, sipping some water, and perhaps taking a mild pain-killer for headache should have you back on your feet in twenty minutes or so.
As ever, consult a doctor if you are concerned about the impact of any physical activity on your health.
One last consideration would be that a small section of the hike consists of a railway bridge that may be bothersome to those with a fear of heights. Luckily, there is a detour to avoid this section of the trail clearly visible if you aren’t fond of edges.
ABOUT THAT VIEW…
You’ve made it to the top, so now what? Well, look around, you can expect to see a large section of the southern Oahu coastline, the clear blue of the Pacific, a bird’s eye perspective of Hanauma Bay, the botanical gardens inside the crater, and WW2 structures.
Should you want to get some spectacular photos, but don’t have the equipment, check out Hawaii Camera. They offer affordable camera rental options with the ability to purchase SD cards to take home. They will also mail the supplies to the location of your choice anywhere in Hawaii, be it a hotel, condo, or FedEx office. There are even underwater camera options for a wide range of adventures.
One way to enhance your photography opportunities is to head for your hike shortly before sunrise. Just remember to take a flashlight and be careful walking unfamiliar ground in low visibility. Witnessing the sunrise from the top of Koko Crater is definitely worth the early morning!
ANY OTHER NEARBY ATTRACTIONS?
While in the area, you can include many other side trips to your hike. One option is taking an alternate route up or down from Koko Crater for a bit more of a challenge on the Koko Crater Arch Trail, which offers exciting rock formations and steep drop-offs. Not recommended for those with a fear of heights, and it requires shuttle arrangements or a second vehicle but could be an excellent option for the more adventurous hiker.
Also, the botanical gardens inside the crater are worth a look. They are devoted mainly to different types of cacti and succulents and are said to be quite photogenic. The loop trail inside is two miles and easy walking.
Most of all, be safe, take pictures, make some unique memories, and have a great, adventurous day of fun in the sun!
